Setting up a reliable Salesforce-HubSpot integration is essential for businesses looking to keep sales and marketing data in sync. Whether you're syncing contacts, leads, accounts, or opportunities, properly configuring your HubSpot Salesforce sync will help avoid data loss, permission errors, and sync failures.
One of the most important best practices for syncing HubSpot with Salesforce is using a dedicated Salesforce Integration User. In this guide, we’ll walk through how to set up an Integration User specifically for HubSpot, including best practices for permissions, email configuration, and testing your sync.
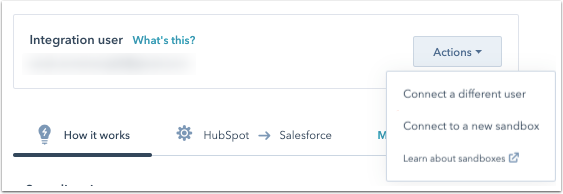
Before fully diving into this how to, we recommend taking a look at our Integration User Configuration post to get an understanding of this feature.
Why Use an Integration User for HubSpot–Salesforce Sync?
HubSpot offers powerful integrations across CRM, marketing automation, sales, and customer service. When syncing with Salesforce, using a dedicated Salesforce Integration User for HubSpot ensures consistent access, improves sync stability, and limits risk from changes in personal user accounts. It also simplifies audit trails and API usage tracking as you'll be able to see changes made specifically by the dedicated integration user rather than trying to diagnose a mess of edits by a user tied to multiple integrations.
Step 1: Create a Google Group Email for Your Integration User (Optional but Recommended)
Salesforce requires a unique email for each user, including system accounts like Integration Users.
If you're managing multiple integrations or need a scalable setup, we recommend using a Google Group to host your Integration User email. This allows shared access and better control over communications related to sync errors or alerts.
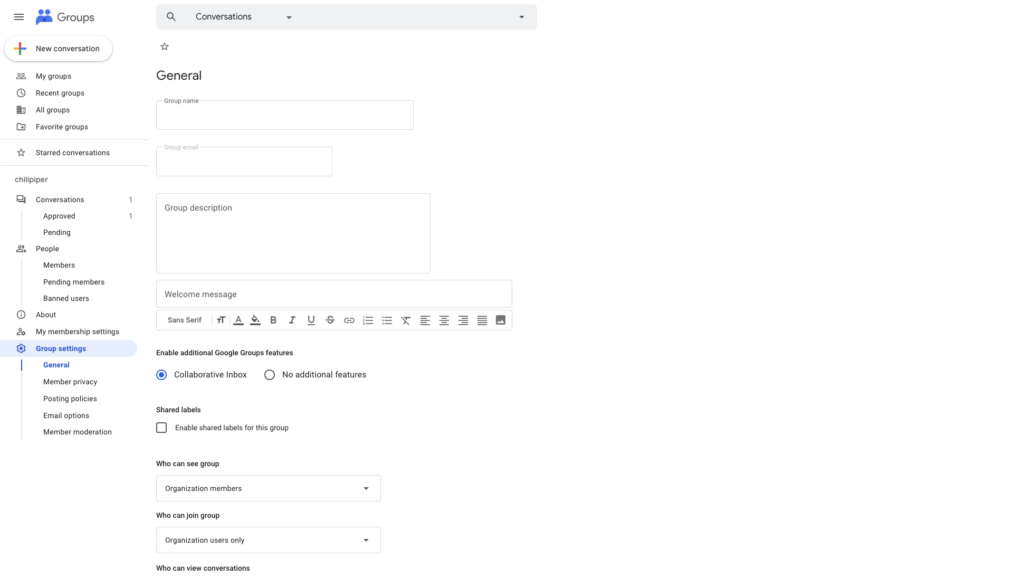
How to Create a Google Group Email:
- Login to your Google account and open Google Groups.
- Click "Create Group" and fill out the name and email handle.
- Under settings, enable:
- Collaborative Inbox
- Who can post: Anyone on the web
- Who can contact group owners: Anyone on the web
- Default sender: Group address
Step 2: Create the Salesforce Integration User for HubSpot
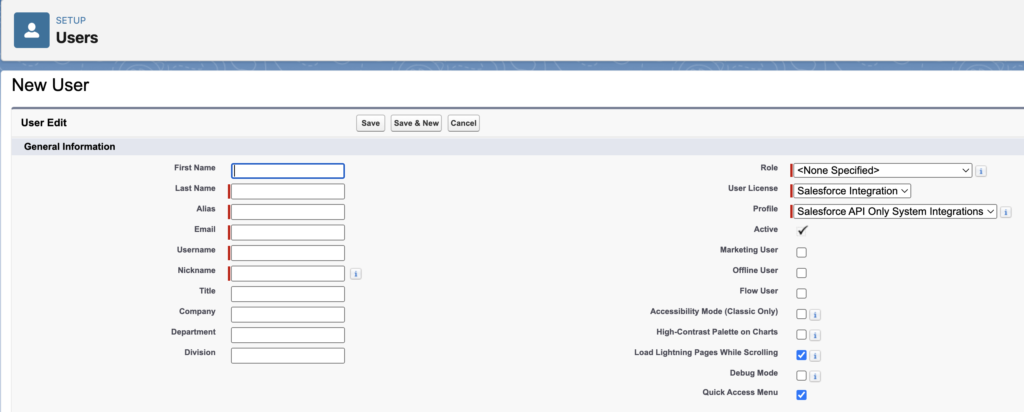
- In Salesforce, go to:
Setup > Users > New User. - Fill in the following details:
- First Name: HubSpot
- Last Name: Integration
- Email: Use the Google Group email
- Username: Must be unique
- Role: Choose “Integration User” or similar
- User License: Salesforce Integration
- Profile: Salesforce API Only – System Integrations
- Click “Save.”
Assign Permission Set License:
- Go to the user's detail page.
- Under Permission Set License Assignments, click “Edit Assignments.”
- Enable Salesforce API Integration.
- Click Save.
Step 3: Create a Custom Permission Set for HubSpot Integration
Salesforce is transitioning away from Profiles in Spring ’26, so you should manage permissions via Permission Sets. This also ensures fine-grained control over what HubSpot can access during sync.
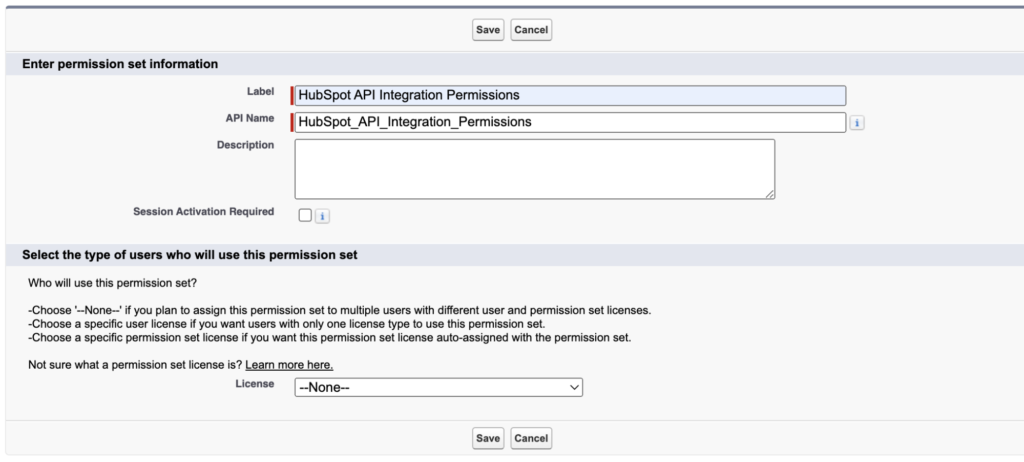
Create the Permission Set:
- Go to
Setup > Users > Permission Set> New Permission Set. - Label it something like "HubSpot Integration."
- Save.
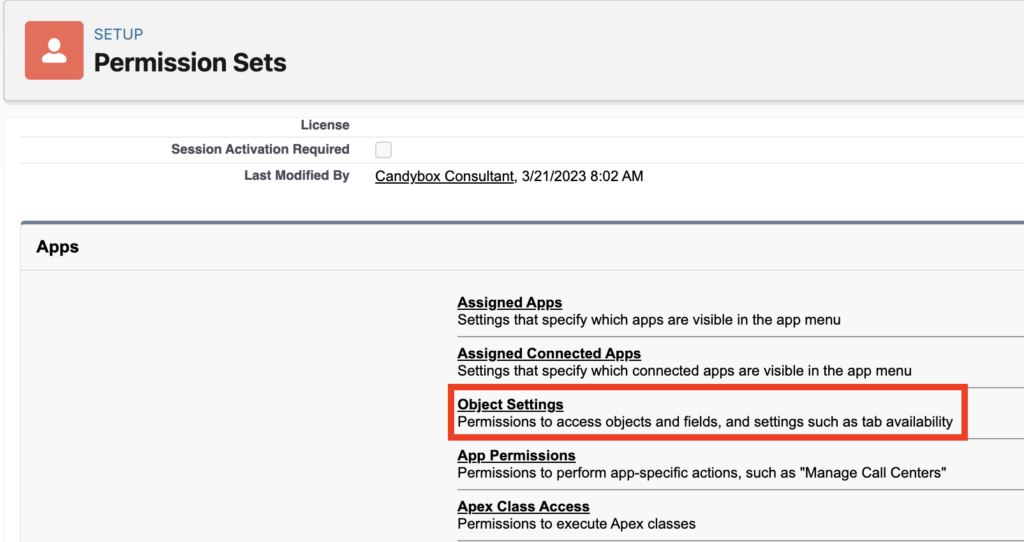
Object Permissions (for HubSpot sync):
Go to Object Settings and enable Read, Create, Edit, Delete for:
- Accounts
- Contacts
- Leads
- Opportunities
- Campaigns
Ensure all fields referenced by HubSpot also have Read/Edit access.
System Permissions:
Go to System Permissions and enable:
- Access Activities
- Edit Events
- Edit Tasks
- Modify Metadata Through Metadata API Functions
- View Setup and Configuration
-

Assigning the Permission Set to the User
- Click "Manage Assignments."
- Click "Add Assignments."
- Select the Hubspot Integration User.
- Click "Assign" and then click "Done" to complete the assignment process.

Step 4: Connect Your Salesforce Integration User in HubSpot
- Log in to HubSpot with admin rights.
- Navigate to
Marketplace > Connected Apps. - Search for Salesforce, click to open it.
- Under Sync Settings, click Actions > Integration User Login.
- Log in with your newly created Salesforce Integration User credentials.
Once connected, review field mapping statuses across synced objects (Contacts, Leads, etc.). Each should show a status of “OK.” If any fail, revisit your permission set to ensure the correct fields have Read/Edit access.
Step 5 (Optional): Test the HubSpot–Salesforce Sync
Create a test record in both Salesforce and HubSpot. Modify key fields to trigger a sync and confirm:
- No sync errors occur
- Records are syncing as expected
- Data mappings are accurate
If issues arise, verify object permissions and API access for your Integration User.
Final Thoughts: Best Practices for a Healthy HubSpot Salesforce Sync
Using a dedicated Salesforce HubSpot integration user improves system reliability, auditability, and ease of troubleshooting. It also ensures that your HubSpot Salesforce sync remains functional even if individual team members leave the organization.
If you're unsure how to set up a sync correctly or want help optimizing your Salesforce–HubSpot integration, our team at Candybox can help you configure, clean up, and future-proof your GTM systems.
👉 Need help setting up your HubSpot–Salesforce sync the right way? Contact us here and we'll be happy to advise.


.png)