.png)
There are almost endless use cases for why you might want to get notified in Slack when something happens in Salesforce. Some examples off the top of my head are:
- An opportunity has moved into Closed Won 🙌
- An accounts health has dropped into the negative ‼️
- A new lead has come in that requires follow-up 👋
- A new case has come in that requires follow-up 🕓
For the purposes of this demo, we’re going to take a real-life scenario. When someone comes to our website and sends us a message via the Contact Us form, we want to notify everyone in Slack so that we can follow up as soon as possible.
Here’s how you’d achieve that in Salesforce - no joke - in ten minutes or less. I’ll start my stopwatch!
1 Create your Slack channel
First of all, we need somewhere to post those alerts to. If you have an existing channel in Slack, you can skip this step. Otherwise, log in to your Slack workspace and complete the following steps:
- Under Channels, click the + sign and select Create a Channel
- Give your new channel a name and (optionally) a description
- If the channel should be invite-only, toggle it to private
- Hit Create
- (Optional) Add team members to the channel
Creating a new Slack channel
2 Create an email integration in Slack
Now that you have your shiny new channel, you want to set up an email integration so that data can be emailed to it. To do this:
- Go to the Apps section of your Slack workspace and hit the + button
- Search for Email and select the first result
- Hit Settings to open a new tab
- In the new tab, click Add to Slack
- Select the channel where you want the notifications to be posted and hit Add Email Integration
- In the integration settings screen, I recommend changing the name of the integration, since this will be displayed to used in Slack and also picking a fun emoji 🎁
- Once you’re happy, save the integration

Creating a new email integration in Slack
3 Create an email template in Salesforce
Let’s head back into Salesforce and create an email template.
- In Salesforce, go to Setup and search for Email Templates
- Create a text or HTML template with your desired information
- Make the template available for use
It doesn’t matter whether you create a Classic or Lightning template and whether it’s HTML or plain text, so long as it contains the information you want to be able to see in Slack.
Make sure you make it available for use. Below is a screenshot of my alert template.
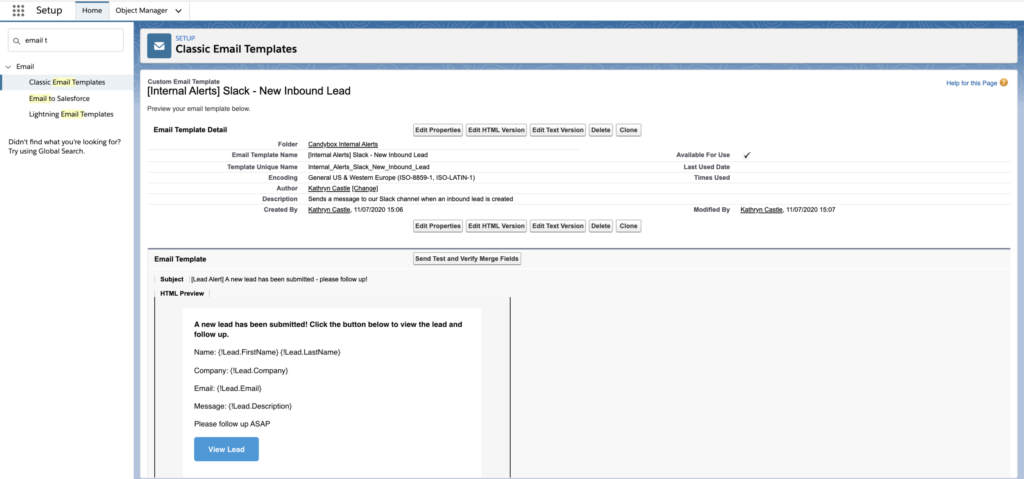
This is more or less what your template should look like
4 Create an email alert in Salesforce
The next step is to set up the email alert itself. This is the action that references the template we just created and which we will later associate with an automation tool like workflow rule or process builder.
- In Salesforce, navigate to Setup and search for Email Alerts
- Click New Email Alert and fill in the following:
- Name
- Object (in our case, this is Lead)
- Email Template (the template you created in the last step)
- Now go back to your Slack integration and copy the email address from your email integration
- Go back to Salesforce and paste the email address into the Additional Emails section of your workflow rule
- Optionally add additional recipients, then save
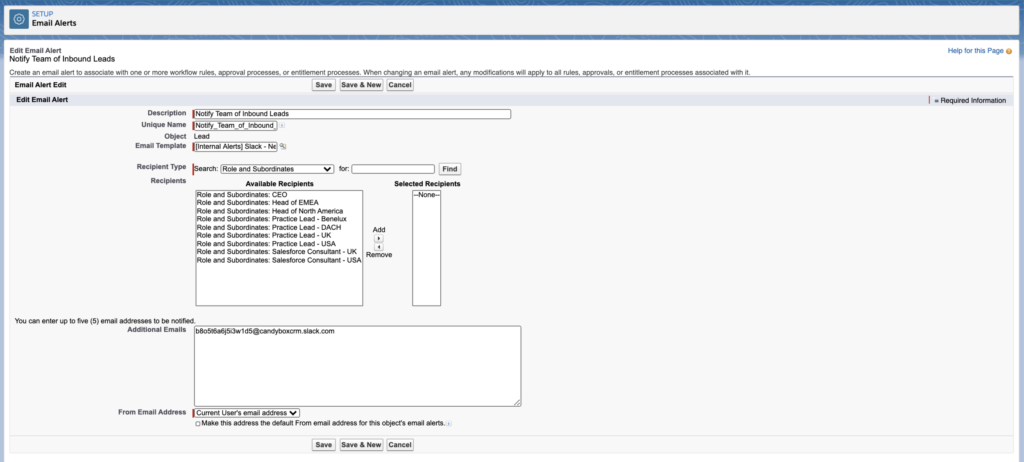
This is how your edit screen should look after adding in the Slack email address

Once saved, your workflow rule will look something like this
5 Create a workflow rule or process builder to trigger the email alert
Now that we have our Slack integration, our email template and our email alert, we can put the final step in place, which is building the automation that actually pings the email address.
I’m going to be using Workflow rule, since it’s a little quicker and easier to demo, however this works just as well in Process Builder, Flow or other tools.
- In Setup, search for Workflow Rules
- Select New Rule
- Choose the object on which you want the rule to fire - in my case, this is the Lead
- Under Edit Rule, add a name and description
- Under Evaluation Criteria, decide whether the rule should fire when the record is created, created and edited or created and every time it is subsequently edited to meet your criteria
- Not sure which to pick? Check this link for help.
- Under Rule Criteria, add the criteria that define when your rule should fire. In my example, I want the rule to run whenever a lead is created with LeadSource = Website
- Hit Save and Next
- Under Immediate Workflow Actions, choose Select Existing Action and search for the Email Alert you created in the previous step of this tutorial
- Click save, then done

Here’s how mine ended up looking
6 Test your automation
You’re now ready to start testing. Let’s see what happens when I submit the Contact Us form on the website now…
SUCCESS!
7 Troubleshooting Issues
Hopefully you’ve been successful, but if not, here are a few common issues and their solution:
My email is corrupted or looks strange
Check your email template for errors and try sending it to a regular email address to see how it renders. If you are using HTML, there is most likely a formatting issue or a broken tag somewhere.
I don’t get a notification in Slack at all
Add another recipient’s email to your email alert so that you can tell if the issue is that the automation isn’t firing or if there’s some issue with the data getting into Slack. If the other email address successfully receives the email, but Slack doesn’t, try double-checking your email integration. Is it set up correctly and firing to the right channel? If so, check your email alert and make sure you’ve entered the Slack email address correctly.
I don’t get a notification in Slack AND additional emails I added didn’t get the email either
In this case, it’s likely that either your forgot to active your workflow rule/process builder (it happens!) or else the criteria it’s supposed to fire under are not met. On records where you expected the rule to fire, go through each criteria to check whether it is met for the record in question. If not, there’s your culprit!
8 Enjoy!
Now that everything is working as planned, give yourself a pat on the back and enjoy the fruits of your labour!
If you have any questions or are looking for help with your Salesforce instance, feel free to contact us with the Contact Us form - we’ll be notified immediately ;)
.png)


