.png)
Salesforce Surveys is a powerful native tool that lets you gather actionable feedback from customers, partners, and internal teams, all within the Salesforce ecosystem. Despite its capabilities, setting up the Salesforce survey tool isn’t always intuitive. In this guide, Candybox - trusted by leading SaaS companies for Salesforce and RevOps consulting - walks you through how to implement and optimize Salesforce Surveys effectively.
What are Salesforce Surveys?
Salesforce Surveys allow organizations to design, distribute, and analyze surveys directly in Salesforce. You can create branded experiences, customize question types, and integrate response data with reports and dashboards all without leaving your CRM.
As a top Salesforce consultant for SaaS companies, we've used Salesforce’s built-in survey tool to help clients automate feedback loops, monitor customer satisfaction (CSAT), and drive revenue operations insights.
Let's now take a look at how we'd approach setting up Salesforce Surveys in our Salesforce instance.
How to enable Salesforce Surveys
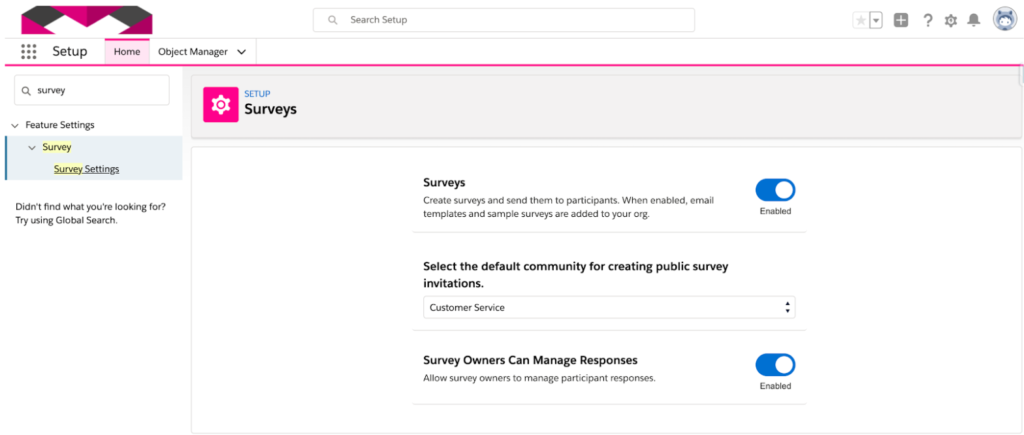
The first step is to enable surveys from the setup menu.
- Select Setup
- Enter Survey in the Quick Find search
- Select Survey
- Select Survey Settings
- Select Enable Surveys
Important note:
- Two sample surveys are added to your Salesforce instance when Surveys are enabled
- To send surveys to your customers, a default community is needed to send out public survey invitations
Permissions Required for Using the Salesforce Survey Tool
Standard profiles:
To be able to create or send a survey, users need to be assigned one of the following four standard profiles:
- Standard user
- System administrator
- Contract manager
- Marketing user
Note:
- The assigned profile must have the View Setup and Configuration permission enabled
- Create, Read, Edit and Delete permissions are needed on the Asset object to be able to insert images in survey pages
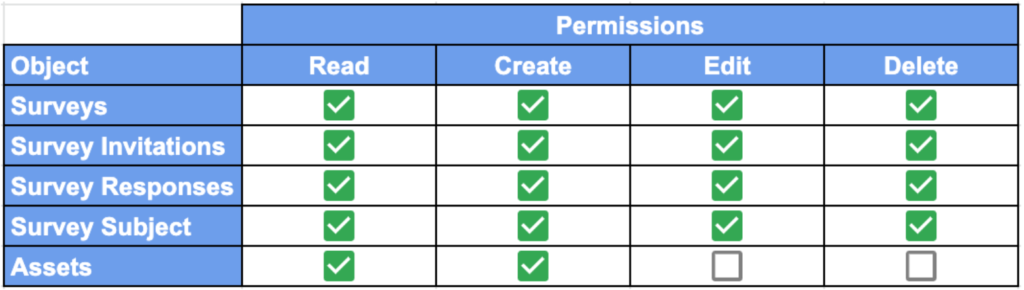
Custom profiles:
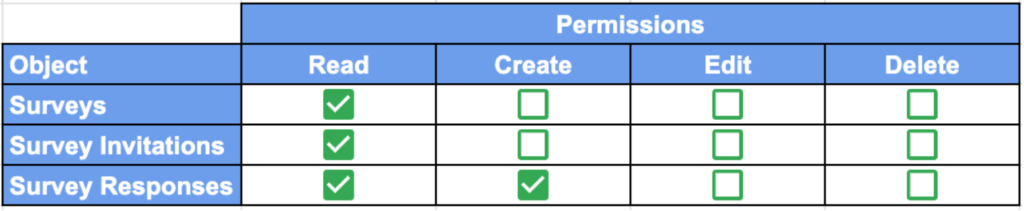
For users with custom profiles that need to be able to create and send surveys, the following object permissions are required:
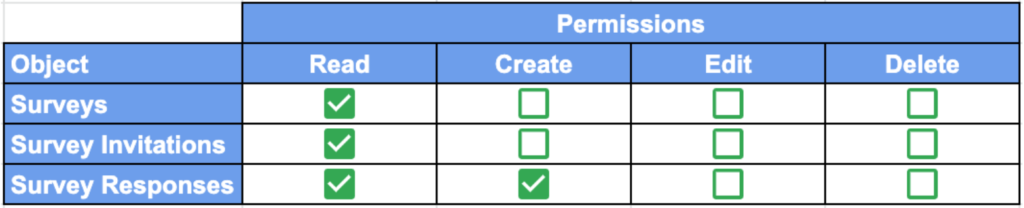
For users within the company to be able to respond to surveys they would need the following permissions:
For guest users to be able to respond to surveys they would need the following permissions on Guest User Profile of the default community:
Survey Sharing Settings
Surveys may contain sensitive information which the survey participant may only need to share with the survey owner. In these cases, administrators can configure the survey sharing settings to ensure the creator can see all the responses, but the participant cannot.
- Select Setup
- Enter Sharing in the Quick Find search
- Select Sharing Settings
- Select Edit
- Select Private from the dropdown list for Survey
- Select Private from the dropdown list for Survey Invitation
- Select Save

Survey Sharing Settings
Creating Your First Salesforce Survey
Now we are ready to build our first survey 🙌
Step 1
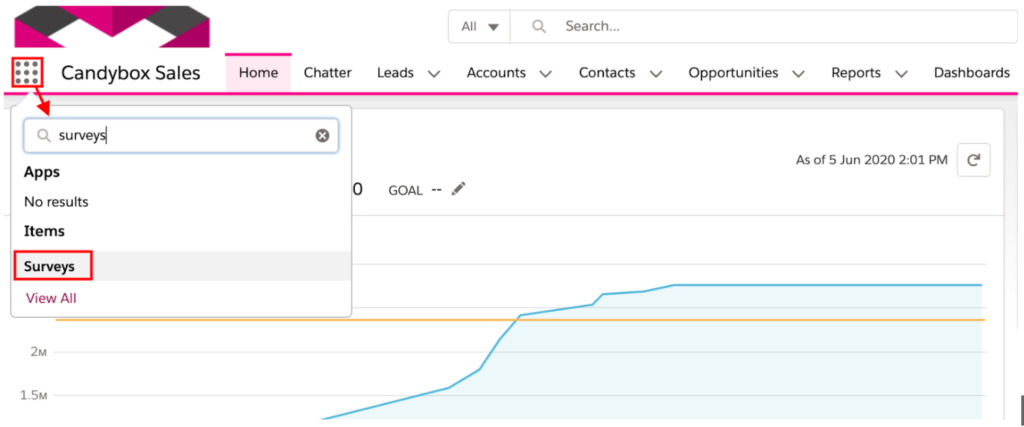
- Select App Launcher
- Search for Surveys
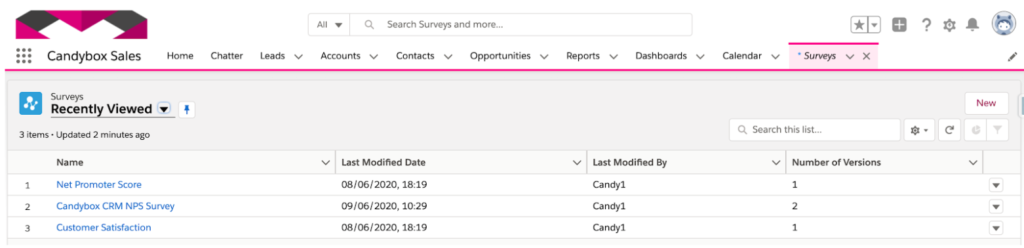
Step 2
- Select the New button
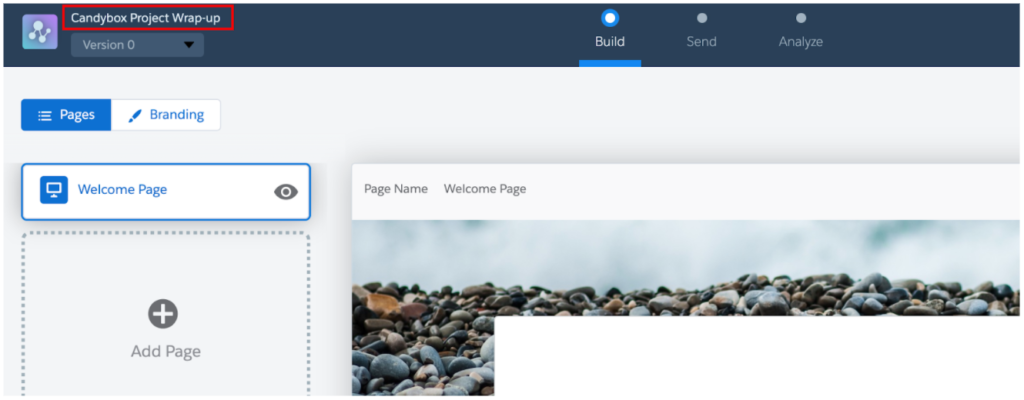
Step 3
- Select Name in the top left corner
- Enter the Survey name
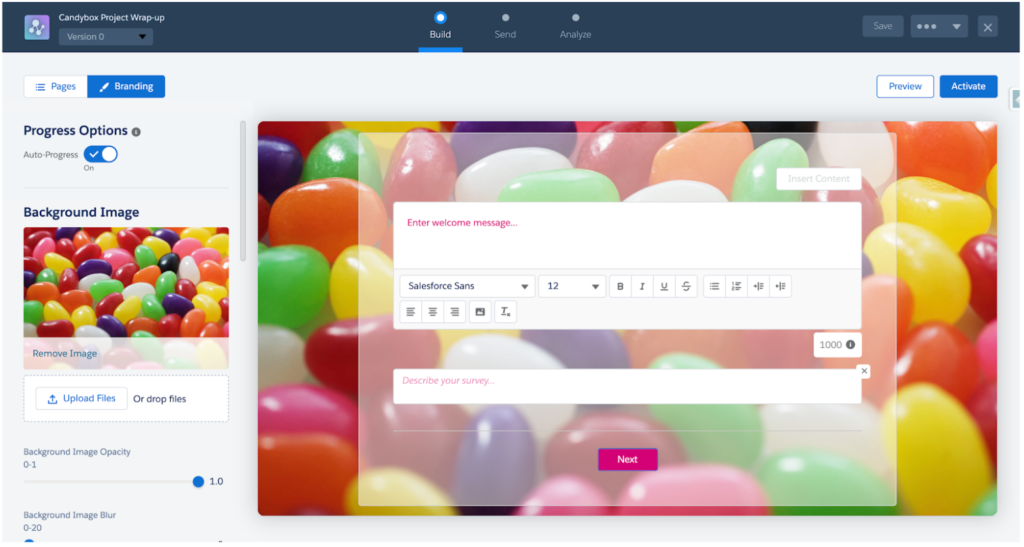
Step 4
- Select the Branding tab
- Enable Auto-Progress
- Upload an image for the background
Step 5
- Optionally change the following in this section
- Content card opacity: 0.7
- Question/Answer colours
- Start, Next and Finish button colour choices

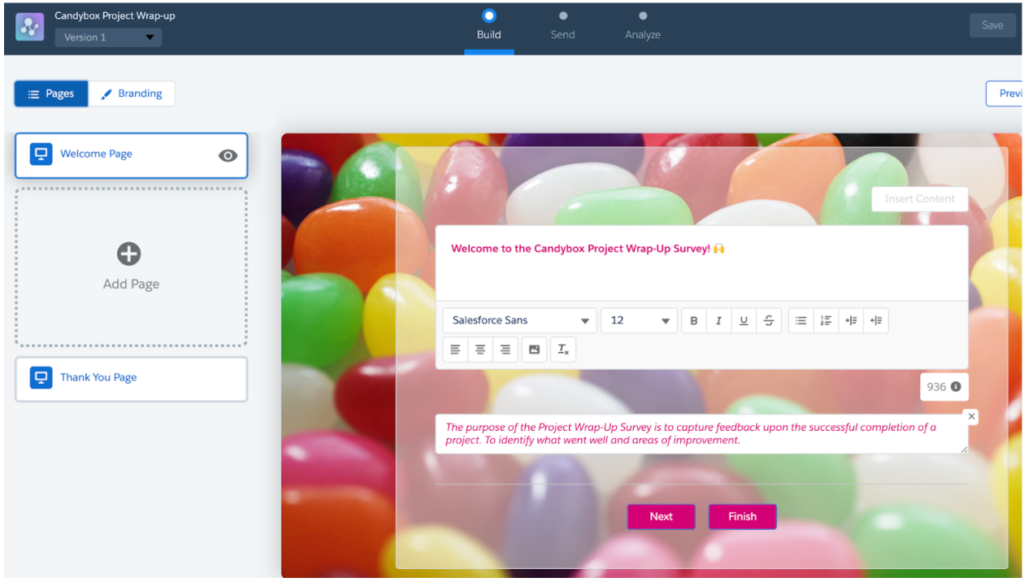
Step 6
- Select the Pages tab
- Add information to the following pages
- Welcome Page
- Thank You Page
- Select the Save button
Adding Survey Questions
Now we are ready to add the main content of the survey - the questions!
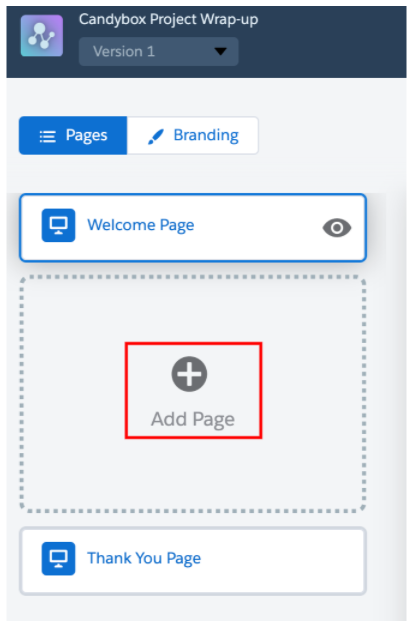
Step 1
- Select Add Page
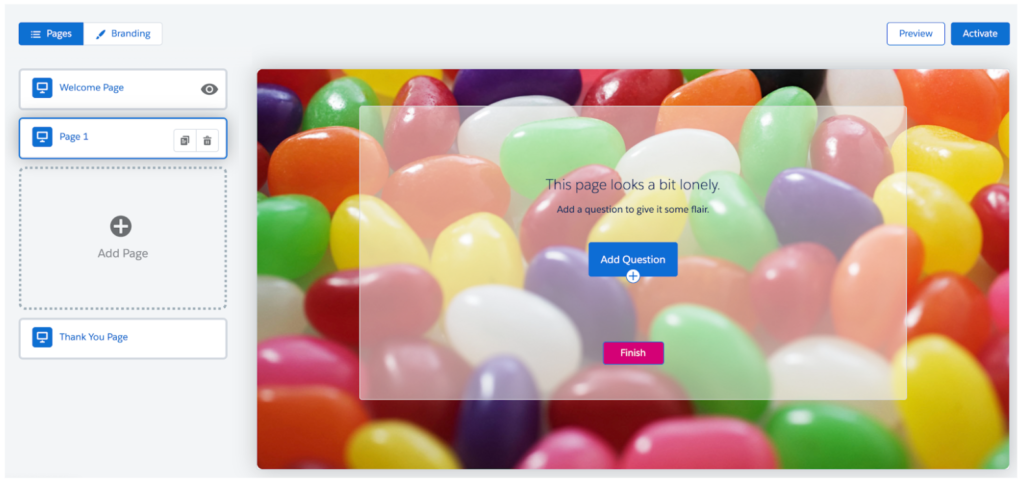
Step 2
- Select Add Question

Step 3
- Select Rating
- Add question text
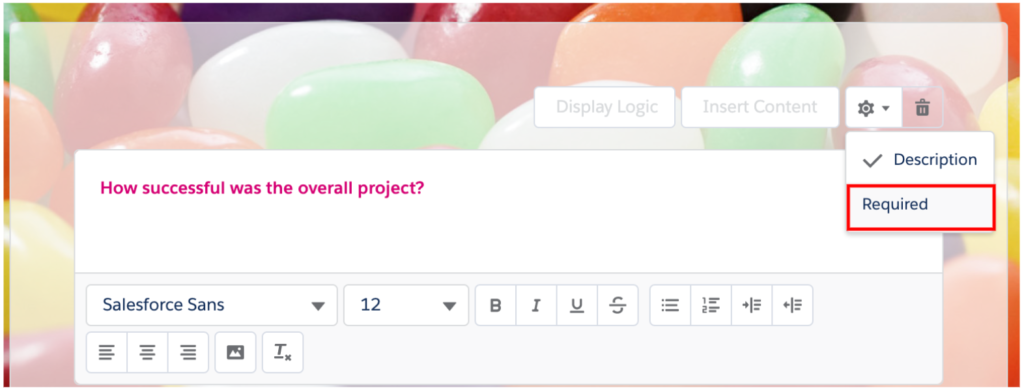
Step 4
- Select Cog and Required (optional)
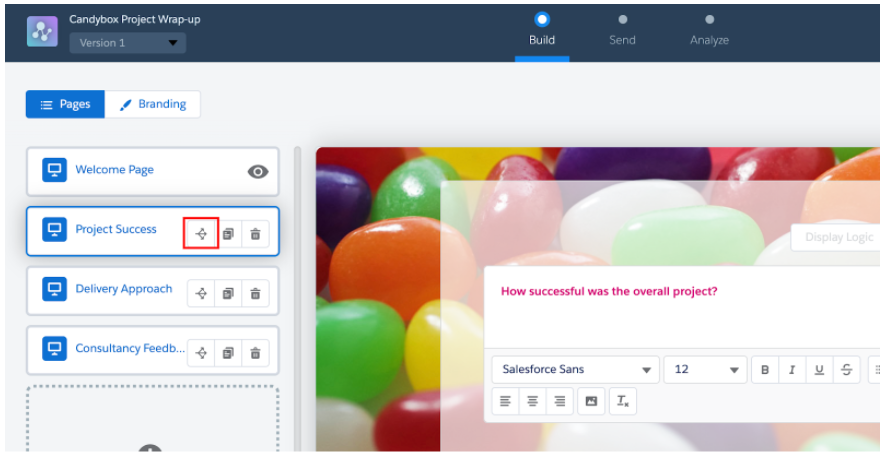
Repeat steps 1-4 until you have added all questions you need. Final Survey pages will look something like this:

Using Survey Logic (Branching and Conditions)
Administrators can personalize the participants’ experience by either adding page branching or question logic.
For example in our survey, if the participant scores a 5 for the first then we would like to skip to the 3rd page of the survey.
We can do this by following these steps:
Step 1
- Select Page Branching
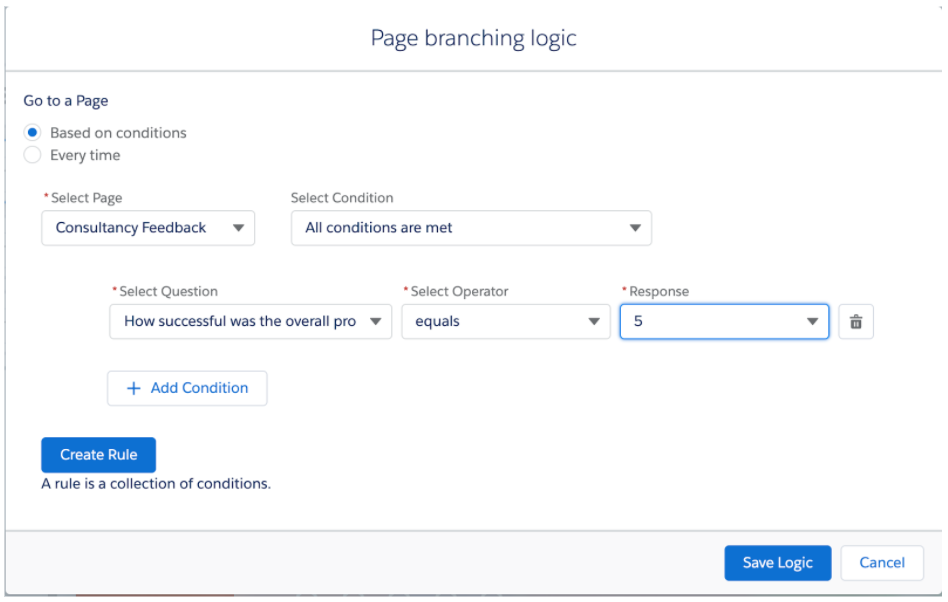
Step 2
- Enter the following conditions for the branching logic
- Go to a Page: Based on conditions
- Select Page: Consultancy Feedback
- Select condition: All conditions are met
- Select Questions: How successful was the overall project?
- Select Operator: equals Response: 5
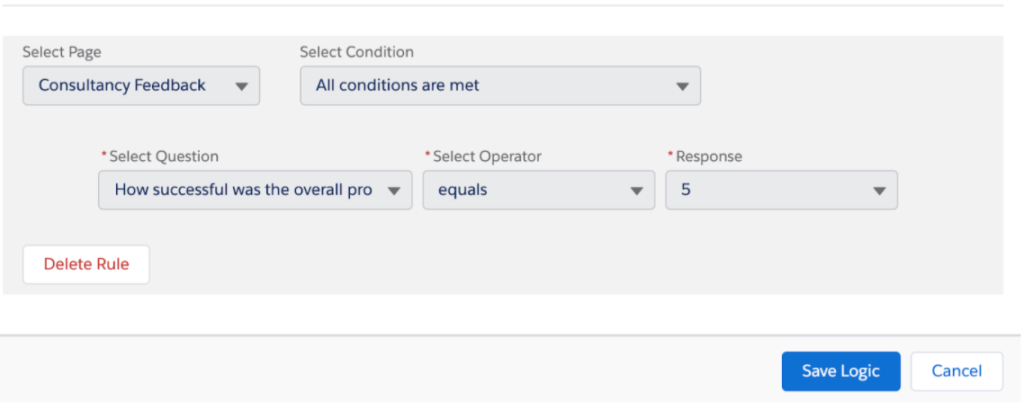
Step 3
- Select Create Rule
- Select Save Logic
Rules can be added for question logic also. A good example use case would be when a participant selects a score below a certain value, then you might want display a text prompting them for the reason behind the low score. Display logic can be found on the questions on a survey page.
Now that we have added our branching logic we can activate our survey!
Activating Your Salesforce Survey
We have completed the build of our survey and have finished adding questions and page branching logic. Before we can send out the survey, though, we must first activate it.
The survey can be activated by selecting the Activate button followed by the Got It button.
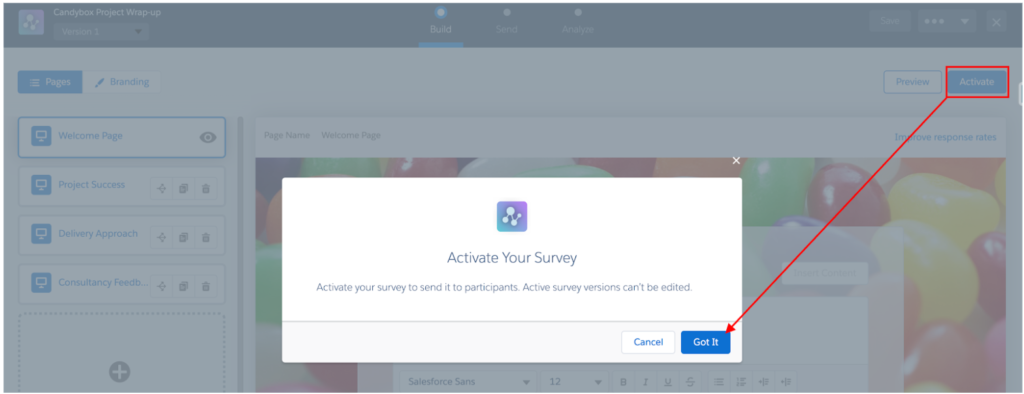
We have now successfully activated our survey! Now to send it to our participants!
Sending Surveys in Salesforce
To be able to send out the survey we must go to the Send tab of the survey.
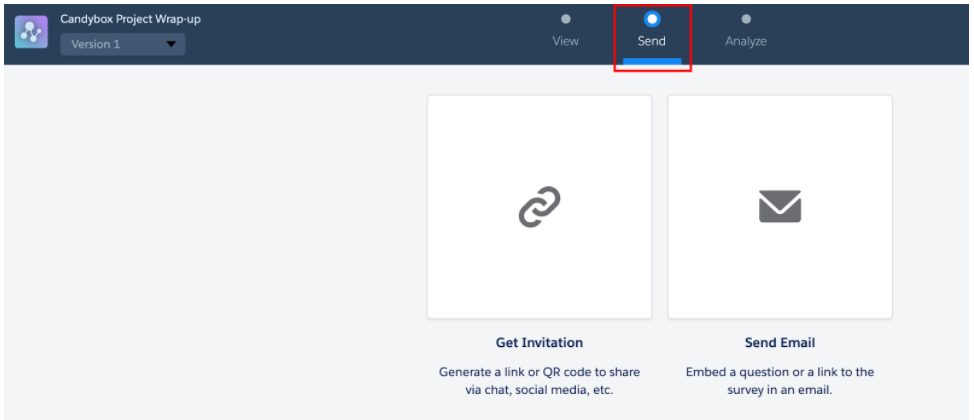
For this scenario, I’ll be sending the participant an email.
Complete the following steps:

- Select Send Email
- Select Content from dropdown
- Select Next button
- Add a recipient address
- Select Next button
- Select Send button
We now have sent out a survey to a customer to be completed.
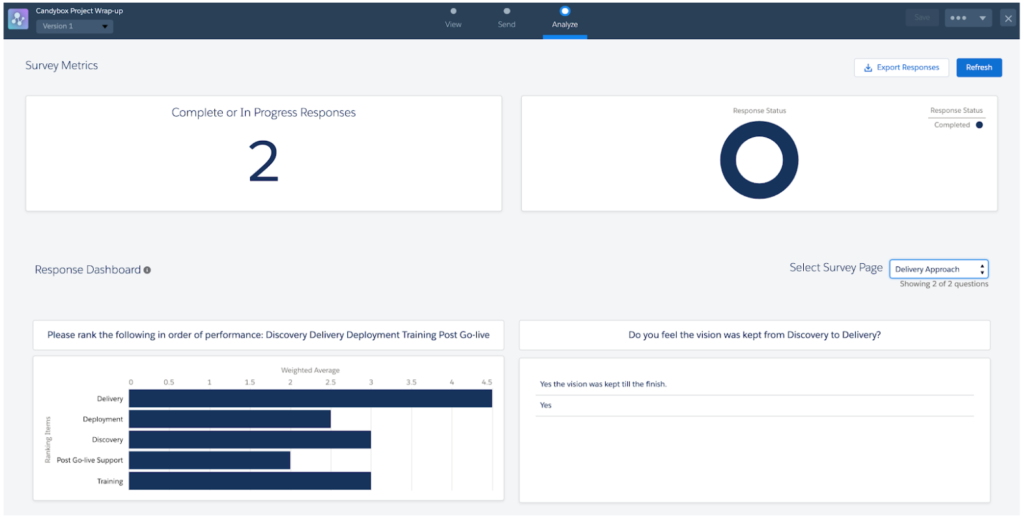
Analyzing Survey Responses
To analyze your Survey Responses you have to go to the Analyze tab. Here you can see responses for all the completed surveys. Survey responses can be exported if needed.
Best Practices From the Field
As a leading Salesforce consultancy for SaaS businesses, some ideas you may wish to steal for implementing surveys are:
- Surveys that trigger after support case resolution
- Surveys that measure onboarding satisfaction
- Surveys that quality upsell readiness after QBRs
These workflows turn Salesforce Surveys into a revenue feedback engine rather than just a data collection tool.
Final thoughts
In summary, Salesforce Surveys have come a long way since its inception, but now we have a well-rounded feature that should be explored and used for business cases.Whether you;re capturing NPS, CSAT, or product feedback, the Salesforce survey tool offers seamless integration and robust reporting.
Need help implementing surveys tailored to your RevOps model? At Candybox, we've built smart survey automation for dozens of growth-stage SaaS teams and we'd love to help you do the same.
👉 Book a free RevOps consultation with our team to explore how Salesforce Surveys can drive smarter growth.